Support our educational content for free when you purchase through links on our site. Learn more
How to Troubleshoot 12 Common 3D Printer Issues Like a Pro 🔧 (2025)

You’ve just hit “print” on your latest 3D model, full of excitement—and then disaster strikes. Layers suddenly shift, corners warp, or stringy spiderwebs appear where smooth surfaces should be. Sound familiar? Don’t worry, you’re not alone. Even seasoned pros at Best 3D Printer™ have faced these maddening hiccups. The good news? Most common 3D printing issues like layer shifting and warping have straightforward fixes once you know where to look.
In this article, we’ll unravel the mysteries behind 12 frequent 3D printing problems, sharing expert tips, real-life troubleshooting stories, and proven solutions. Curious how a simple cable reroute saved a 30-hour architectural print from disaster? Or how tweaking slicer settings can banish stringing forever? Stick around—we’ve got you covered from belts to bed adhesion, firmware tweaks to filament choices. By the end, you’ll be armed with the know-how to turn your printer into a reliable, precision powerhouse.
Key Takeaways
- Layer shifting is often caused by loose belts, pulleys, or printing too fast; tightening and slowing down usually fixes it.
- Warping stems from poor bed adhesion and temperature inconsistencies—heated beds, enclosures, and adhesives are your best friends.
- Material choice heavily influences troubleshooting; ABS demands different care than PLA or PETG.
- Regular calibration and maintenance prevent most common failures—think of it as tuning your 3D printing racecar.
- Advanced firmware features like input shaping and linear advance can dramatically improve print quality and reduce errors.
Ready to upgrade your printing game? Check out our best 3D printer reviews and explore top brands like Creality and Prusa to find your perfect match!
Table of Contents
- ⚡️ Quick Tips and Facts to Fix Your 3D Printer Fast
- 🛠️ The Evolution of 3D Printing and Why Troubleshooting Matters
- 🔍 Understanding Common 3D Printing Problems: Layer Shifting, Warping & More
- 🧰 12 Essential Steps to Troubleshoot Layer Shifting Like a Pro
- 🔥 Tackling Warping: Proven Techniques to Keep Your Prints Flat and Fabulous
- 🧪 How Material Choice Influences Print Quality and Troubleshooting
- ⚙️ Calibration and Maintenance: The Unsung Heroes of Smooth Printing
- 💡 Diagnosing Other Pesky Issues: Stringing, Under-Extrusion, and More
- 🔧 Firmware and Software Tweaks That Can Save Your Prints
- 🧑🔧 Expert Tips from the Best 3D Printer™ Team: Real-Life Troubleshooting Stories
- 📚 Recommended Resources and Tools for 3D Printer Troubleshooting
- 🎯 Wrapping It Up: Your Go-To Guide for 3D Printing Success
- 🔗 Recommended Links for Further Learning
- ❓ Frequently Asked Questions About 3D Printer Troubleshooting
- 📖 Reference Links and Credible Sources
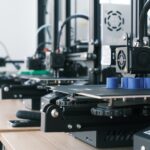
Alright, team, let’s get our hands dirty! 🛠️ You’ve unboxed your shiny new machine, maybe even one from our list of the best 3D printers, you’ve sliced your first model, and you hit “print.” Everything is going great… until it isn’t. Suddenly, your masterpiece looks more like a modern art disaster. Don’t panic! We’ve all been there. Here at Best 3D Printer™, we’ve seen every spaghetti monster, every shifted layer, and every warped corner imaginable.
This isn’t just a guide; it’s your 3D printing survival manual. We’re going to dive deep into the nitty-gritty of troubleshooting, turning those frustrating failures into glorious successes. Ready to become a 3D printing whisperer? Let’s do this!
⚡️ Quick Tips and Facts to Fix Your 3D Printer Fast
In a hurry? Sometimes the fix is faster than the pre-heat! Here are some rapid-fire solutions to the most common headaches.
| Problem | Quick Fix | Common Cause(s) |
|---|---|---|
| Layer Shifting | Check and tighten your X and Y-axis belts. They should be taut like a guitar string, not floppy. | Loose belts, printing too fast, physical obstructions. |
| Warping | Clean your print bed with isopropyl alcohol and apply a layer of glue stick. | Poor bed adhesion, drafts, incorrect bed temperature. |
| Stringing | Increase retraction distance and speed in your slicer settings. | Retraction settings, print temperature too high. |
| Under-Extrusion | Check for a clogged nozzle or a tangled filament spool. | Nozzle clog, incorrect filament diameter, extruder issues. |
| Poor Bed Adhesion | Re-level your print bed. The nozzle should be close enough to the bed to grip a piece of paper with slight resistance. | Bed isn’t level, Z-offset is too high, dirty print surface. |
Did you know? The concept of 3D printing, or additive manufacturing, has been around since the 1980s. Chuck Hull is credited with inventing the first 3D printing process, stereolithography, in 1983. So, these problems have been bugging people for decades!
🛠️ The Evolution of 3D Printing and Why Troubleshooting Matters
Remember the days of dot matrix printers screeching away? We’ve come a long way. The journey of Fused Deposition Modeling (FDM) printers from garage-built RepRap projects to the sleek machines from top 3D Printer Brands like Creality and Prusa Research is incredible. But here’s the secret: at their core, they are still precise robots laying down molten plastic one layer at a time. And with precision comes the potential for error.
Think of your 3D printer as a high-performance race car. You can’t just floor it and expect to win every time. It needs tuning, maintenance, and a driver (that’s you!) who understands how it handles. As the experts at Wevolver state, “Recognizing and addressing these problems proactively can therefore dramatically improve the efficiency of your 3D printing operations.”. Mastering these skills is what separates the hobbyists from the pros, especially for those using 3D Printers for Small Businesses.
🔍 Understanding Common 3D Printing Problems: Layer Shifting, Warping & More
Before we fix things, let’s play detective. What exactly is going wrong?
What is Layer Shifting?
Imagine you’re building a tower of LEGOs, but halfway through, someone bumps the table. The rest of your tower is now offset, creating an ugly “step.” That’s layer shifting. It’s a sudden, unwanted horizontal displacement in your print. The folks at Sovol3D describe it perfectly: it can “ruin the look and strength of a print, making it deviate from the original design.”. It’s one of the most dramatic and frustrating print failures.
What is Warping?
You’ve printed a perfectly flat box, but when you pop it off the build plate, the corners are curled up like a mischievous grin. That’s warping. It happens when the upper layers of your print cool and contract, pulling the base of the print up and away from the build surface. It’s a battle of thermodynamics happening right on your print bed! As the comprehensive Simplify3D Print Quality Troubleshooting Guide emphasizes, “A strong first layer is crucial for preventing warping and ensuring a successful print.”.
So, what’s the gremlin in the machine causing all this chaos? Is it a ghost? A curse? Or something we can actually fix? (Spoiler: It’s the latter).
🧰 12 Essential Steps to Troubleshoot Layer Shifting Like a Pro
Layer shifting feels catastrophic, but the fix is often surprisingly simple. Let’s walk through the checklist we use here at the shop.
Mechanical Gremlins ⚙️
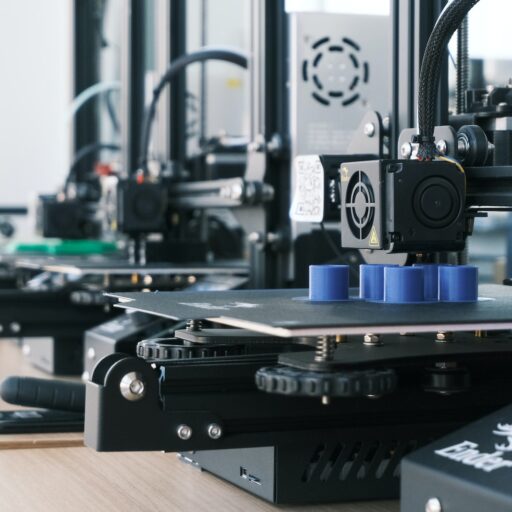
1. Check Your Belts! (Seriously, Check Them Now)
This is the #1 culprit. Your X and Y-axis belts control the movement of the print head and bed. If they’re loose, they can slip on the motor pulley, causing the printer to lose its position.
- How to Check: Pluck the belt. It should make a low, bass-like “twang.” If it’s floppy, it’s too loose. If it sounds like a high-pitched guitar string, it might be too tight, which can also strain the motors.
- The Fix: Find the tensioners on your printer (many modern printers like the Creality Ender 3 V2 have convenient knobs) and tighten them until you get that satisfying twang.
2. Secure the Pulleys
The pulley is the little gear on the stepper motor that the belt rides on. It’s usually secured by one or two tiny grub screws.
- How to Check: Try to wiggle the pulley on the motor shaft. There should be zero play.
- The Fix: If it moves, rotate it so one of the grub screws is facing the flat part of the motor shaft and tighten it down firmly with the correct Allen key. As the video summary points out, a loose grub screw means the motor’s movement won’t fully translate to the print head..
3. Look for Physical Obstructions
This might sound silly, but it happens!
- How to Check: With the printer off, manually and slowly move the print head and bed through their full range of motion. Do you feel any snags or bumps?
- The Fix: Check for wires or Bowden tubes catching on the frame. Ensure your filament isn’t tangled on the spool. We once had a print fail repeatedly because a stray piece of plastic had fallen into the V-slot rail! For a great visual guide on this, check out the first YouTube video in this article, which dives deep into diagnosing physical obstructions.
4. Clean and Lubricate Your Rods and Bearings
Friction is the enemy of smooth movement.
- How to Check: Are the movement axes noisy or rough?
- The Fix: Wipe down the smooth rods or V-slot extrusions with a microfiber cloth. For rods and lead screws, apply a small amount of appropriate lubricant like white lithium grease or Super Lube.
Electrical Hiccups ⚡
5. Cool Down Your Stepper Drivers
The small chips on your mainboard that control the motors can get hot, especially during long prints. When they overheat, they can temporarily shut down to protect themselves, causing the motor to miss steps.
- How to Check: Feel the heatsinks on your mainboard (be careful!). Are they excessively hot to the touch? Is the mainboard cooling fan working?
- The Fix: Ensure your printer’s electronics have adequate ventilation. If needed, you can often upgrade the cooling fan for better airflow.
6. Check Stepper Motor Temperature
Likewise, the motors themselves can overheat.
- How to Check: A warm motor is normal, but if it’s too hot to comfortably touch, you may have an issue.
- The Fix: This is often caused by the motor current (Vref) being set too high in the firmware. Adjusting this is an advanced topic, but it’s a common cause of persistent shifting. Sovol3D’s guide mentions that calibrating stepper motor voltage (VREF) is a key step for inspection..
Software and Slicer Settings 💻
7. Slow It Down, Speedy!
We all want our prints done yesterday, but printing too fast is a classic cause of layer shifting. The motors simply can’t keep up with the commands, and they skip steps.
- The Fix: Reduce your overall print speed in your slicer (like Ultimaker Cura or PrusaSlicer). Pay special attention to the “Travel Speed” setting.
8. Adjust Jerk and Acceleration
These settings control how quickly the printer changes direction. Think of it like a car. If you slam on the gas and whip the steering wheel, you’ll lose traction.
- The Fix: Lower the “Jerk” and “Acceleration” values in your slicer or printer firmware. This will result in smoother, less aggressive movements. The video guide highlights that high acceleration can exceed the stepper motor’s torque, causing skipped steps..
9. Check for Print Collisions
Sometimes the nozzle itself can crash into the print.
- The Cause: This often happens if a part of the print warps or curls upwards, creating an obstacle. It can also be caused by over-extrusion leaving blobs on the surface.
- The Fix: Enable “Z-Hop” (or “Lift Z”) in your slicer. This tells the printer to lift the nozzle slightly before traveling over printed areas, avoiding collisions. As Sovol3D wisely advises, “Enable Z-hop to lift the nozzle over the print.”.
10. Update Your Firmware
Sometimes, bugs in the printer’s firmware can cause motion control issues.
- The Fix: Check the manufacturer’s website (e.g., Bambu Lab‘s support page) for the latest firmware version for your specific model.
11. Use Input Shaping
This is a more advanced feature found in firmware like Klipper and modern Marlin builds.
- What it is: Input shaping is a clever algorithm that anticipates and cancels out the vibrations that cause print quality issues and can contribute to layer shifts at high speeds. The video summary notes that “Input shaping prevents layer shifts.”.
- The Fix: If your printer supports it, enabling and tuning input shaping can be a game-changer for both speed and reliability.
12. Slice and Dice Again
On rare occasions, the G-code file itself can become corrupted during the slicing process or transfer to the SD card.
- The Fix: Try re-slicing the model and saving it to a different, freshly formatted SD card. It’s a simple step that can save you a lot of headaches.
🔥 Tackling Warping: Proven Techniques to Keep Your Prints Flat and Fabulous
Warping is a sneaky foe. It starts small, at the corners, and by the time you notice it, your print is already compromised. The cause is simple: plastic shrinks as it cools. When the top layers cool faster than the bottom layers stuck to the warm bed, a powerful pulling force is created. Here’s how to fight back.
The Foundation: Bed Adhesion is Everything
Your first layer is the foundation of your entire print. If it’s not perfect, nothing else will be.
- ✅ Level Your Bed: We can’t say this enough. Your nozzle needs to be the perfect distance from the build plate across the entire surface. Too far, and the filament won’t stick. Too close, and it will block the nozzle. Most modern printers have auto bed leveling, but it’s still crucial to set your Z-offset correctly.
- ✅ Cleanliness is Godliness: Your build plate must be free of dust, oils from your fingers, and old adhesive residue. A quick wipe with isopropyl alcohol (IPA) before every print works wonders.
- ✅ Use an Adhesive: Sometimes, the build surface itself isn’t grippy enough.
- Glue Stick: A thin layer of a basic school glue stick (like Elmer’s) is a fantastic, cheap, and easy solution.
- Hairspray: A light mist of extra-strong hold hairspray (like Aqua Net) can also provide excellent adhesion.
- Specialized Adhesives: Products like Magigoo are designed specifically for 3D printing and work incredibly well, especially for tricky materials.
CHECK PRICE on Adhesion Aids:
- Elmer’s Glue Stick: Amazon | Walmart
- Magigoo: Amazon | MatterHackers
Control Your Environment 🌡️
- ✅ Use a Heated Bed: This is a non-negotiable for most materials beyond PLA. A heated bed keeps the bottom layers of the print warm and reduces the temperature difference that causes shrinkage. Wevolver notes that using a heated bed “maintains consistent temperature and slows cooling.”.
- ✅ Dial in Your Temperatures: Don’t just guess! Use the filament manufacturer’s recommended bed temperature. For ABS, this can be quite high, while PLA needs a gentler warmth.
- ✅ Block Those Drafts! An open window or even an air conditioning vent can wreak havoc on your prints by cooling them unevenly.
- ✅ Get an Enclosure: This is the ultimate weapon against warping. An enclosure traps heat from the printer’s bed, creating a stable, warm ambient temperature. This allows the entire model to cool slowly and evenly. You can buy one, like the popular ones from Creality, or even make a simple one out of a cardboard box for a temporary fix.
Slicer Tricks to the Rescue
Your slicer software is packed with tools to combat warping.
- ✅ Use a Brim or a Raft:
- A brim adds a single layer of extra surface area around the base of your model, like the brim of a hat. This gives it more to hold onto the build plate.
- A raft prints a whole disposable surface underneath your model. The model sticks to the raft, and the raft sticks to the bed. This is great for small, delicate parts or very warp-prone materials.
- ✅ Turn Down the Fan: For the first few layers, you want minimal or no part cooling. This keeps the initial layers as warm as possible to ensure a strong bond with the bed. Most slicers have a setting to keep the fan off for the first 1-3 layers.
- ✅ Add a “Draft Shield”: Some slicers, like Cura, have an experimental setting that builds a thin wall around your print as it goes up, acting as a mini-enclosure to block drafts.
🧪 How Material Choice Influences Print Quality and Troubleshooting
Not all filaments are created equal! The material you choose has a massive impact on the problems you’re likely to face.
| Filament | Common Issues | Troubleshooting Focus |
|---|---|---|
| PLA | Stringing, heat creep, brittleness. | Optimize retraction and cooling. Generally easy to print with and not prone to warping. |
| ABS | Warping, layer separation, toxic fumes. | MUST use a heated bed and an enclosure. Requires high temperatures and excellent bed adhesion. |
| PETG | Stringing, blobs, poor bridging. | A balance between PLA and ABS. Needs careful retraction tuning and moderate cooling. |
| TPU | Stringing, oozing, difficult to feed (especially in Bowden setups). | Print very slowly. Requires a well-calibrated extruder, often a direct drive is recommended. |
As the Wevolver article points out, materials like ABS are highly prone to warping and require strict temperature control, recommending a heated bed around 110°C.. If you’re constantly fighting warping with ABS, your first step should be building or buying an enclosure. It’s a total game-changer.
⚙️ Calibration and Maintenance: The Unsung Heroes of Smooth Printing
Want to know the real secret to avoiding these problems in the first place? Regular maintenance. You wouldn’t drive your car for 50,000 miles without an oil change, right? Your printer needs the same love.
Here’s a simple maintenance schedule we recommend:
- Before Every Print:
- Wipe down the build plate with IPA.
- Check that the filament spool can spin freely.
- Weekly (or every ~40 hours of printing):
- Check belt tension.
- Check for any loose screws or bolts on the frame and axes.
- Clean any dust or plastic debris from the motion system.
- Monthly (or every ~150 hours of printing):
- Lubricate Z-axis lead screws and smooth rods.
- Check for wear on V-rollers and replace if you see flat spots.
- Perform a full calibration, including E-steps (extruder calibration) to ensure you’re not over or under-extruding.
This proactive approach is echoed by multiple experts. Sovol3D states, “If you establish a routine for reliable 3d prints, you will catch small problems before they become big issues.”. Similarly, Wevolver concludes, “Routine calibration and 3D printer maintenance are key to preventing many of the issues this article discusses.”.
💡 Diagnosing Other Pesky Issues: Stringing, Under-Extrusion, and More
While layer shifting and warping are the big show-stoppers, other villains can ruin your prints.
- Stringing or “Hairy Prints”: Looks like fine spiderwebs between different parts of your model.
- Cause: Filament oozing from the nozzle during travel moves.
- Fix: This is almost always solved by tuning your retraction settings. Increase retraction distance and/or speed. Lowering your print temperature can also help.
- Under-Extrusion: Your print has gaps, missing layers, or looks weak and spongy.
- Cause: The printer isn’t pushing out enough plastic. This could be a partially clogged nozzle, a tangle in the filament spool, or a cracked extruder arm.
- Fix: First, try a “cold pull” to clean the nozzle. Then, check the entire filament path from the spool to the hotend for any restrictions.
- Elephant Foot: The first few layers of your print bulge out wider than the rest.
- Cause: The first layer is squished too much against the bed, often combined with a bed temperature that’s too high.
- Fix: Increase your Z-offset slightly so the first layer isn’t so compressed. You can also lower your bed temperature by 5-10°C after the first few layers have printed.
🔧 Firmware and Software Tweaks That Can Save Your Prints
Beyond the basic settings, there are powerful tools in your printer’s firmware and slicer that can elevate your troubleshooting game.
Advanced Slicer Settings
- Coasting: This setting turns off the extruder just before the end of a perimeter, using the built-up pressure in the hotend to finish the line. It’s a great tool for reducing blobs and zits.
- Wipe: This tells the nozzle to travel a short distance over the inside of the print after finishing a perimeter, effectively “wiping” off any excess plastic before a travel move.
- Linear/Pressure Advance: This is a more advanced firmware feature (like Input Shaping) that predicts and compensates for the pressure inside the nozzle. When tuned correctly, it can produce incredibly sharp corners and eliminate blobs, significantly improving overall print quality. It’s a standard feature in Klipper firmware and is becoming more common in Marlin.
Why Firmware Matters
Keeping your firmware updated is crucial. Manufacturers are constantly improving their motion algorithms and fixing bugs. A simple firmware update can sometimes solve persistent quality issues that you’ve been chasing for weeks. It’s also the gateway to enabling powerful features like Input Shaping and Linear Advance, which can dramatically improve the speed and reliability of your machine, especially for those in 3D Printing Industry News who need to stay on the cutting edge.
🧑🔧 Expert Tips from the Best 3D Printer™ Team: Real-Life Troubleshooting Stories
Let me tell you a quick story. We were trying to print a large, complex architectural model for a client on a deadline. It was a 30-hour print, and twice—at around the 20-hour mark—it failed with a massive layer shift. We were pulling our hair out! We checked the belts, the pulleys, the speed… everything.
What was the culprit? The umbilical cable carrying the wires to the print head. It was just long enough to reach the maximum X and Z travel, but at that one specific corner of the print, it would pull taut and snag ever so slightly on the corner of the frame. It was just enough to make the motor skip a few steps. We rerouted the cable to give it a bit more slack, and the third attempt printed flawlessly. It’s a perfect example of how the cause can be something you’d never expect. The lesson: when in doubt, watch your printer like a hawk during a print. Observe its every move.
📚 Recommended Resources and Tools for 3D Printer Troubleshooting
You’re not alone on this journey! Here are some essential tools and resources we keep in our arsenal.
Must-Have Physical Tools
- Digital Calipers: For accurately measuring filament diameter and calibrating printer parts.
- Set of Allen Keys/Hex Wrenches: For tightening every bolt on your machine.
- Nozzle Cleaning Kit: A set of acupuncture needles and a wire brush are essential for clearing clogs.
- Isopropyl Alcohol (90%+): The best solution for cleaning your print bed.
- Scraper/Spatula: For safely removing prints from the bed. A flexible steel sheet is even better!
Essential Software and Websites
- Your Slicer of Choice: Master either Ultimaker Cura, PrusaSlicer, or Simplify3D. They are your primary control panel.
- Calibration Print Generators: Websites like Teaching Tech’s Calibration Site provide easy-to-use G-code generators for things like temperature towers, retraction tests, and acceleration tuning.
- Pronterface (or similar host software): Allows you to connect directly to your printer from a computer to send G-code commands, which is invaluable for advanced calibration.
This combination of physical tools and digital resources will empower you to diagnose and fix nearly any issue that comes your way, making it a fantastic setup for anyone from a student in 3D Printers for Education to a seasoned professional.
🎯 Wrapping It Up: Your Go-To Guide for 3D Printing Success
Phew! We’ve navigated the labyrinth of 3D printing woes—from the dreaded layer shifting to the sneaky warping, and even the pesky stringing and under-extrusion gremlins. If you’ve ever stared at a print that looks like a modern art disaster and wondered, “What on earth went wrong?”, you’re now armed with the knowledge and tools to tackle these challenges head-on.
Remember our story about the sneaky cable snag causing layer shifts? It’s a perfect reminder that sometimes the fix isn’t obvious, but with patience and a keen eye, you’ll uncover the culprit. Whether it’s tightening belts, fine-tuning slicer settings, or investing in an enclosure, every step brings you closer to flawless prints.
Key takeaways:
- Regular maintenance and calibration are your best friends. Don’t wait for problems to pile up.
- Material choice matters. Know your filament’s quirks and adjust your setup accordingly.
- Slow down to speed up. Printing at the right speed and settings prevents many issues.
- Leverage firmware and slicer features. Advanced settings like input shaping and linear advance can transform your print quality.
- Observe your printer during prints. Sometimes, the problem reveals itself if you watch closely.
At Best 3D Printer™, we confidently recommend investing time in learning your machine and its behavior. The more you understand, the fewer surprises you’ll face. And if you’re looking for a reliable machine that minimizes headaches, check out our best 3D printer reviews for models that excel in stability, ease of use, and community support.
Your journey from frustrated beginner to 3D printing maestro starts here. Happy printing! 🎉
🔗 Recommended Links for Further Learning
Looking to gear up or dive deeper? Here are some top picks from our toolkit and trusted resources:
-
CHECK PRICE on Adhesion Aids:
- Elmer’s Glue Stick: Amazon | Walmart
- Magigoo Adhesive: Amazon | MatterHackers
-
👉 Shop Popular 3D Printers:
- Creality Ender 3 V2: Amazon | Creality Official Website
- Prusa i3 MK3S+: Prusa Official Website | Amazon
-
Essential Books on 3D Printing:
-
Calibration Tools:
-
Slicer Software:
❓ Frequently Asked Questions About 3D Printer Troubleshooting
Do award-winning 3D printers experience fewer issues like layer shifting?
Short answer: Yes, but not entirely immune.
Award-winning 3D printers such as the Prusa i3 MK3S+ or the Bambu Lab X1 Carbon are engineered with tighter tolerances, better components, and advanced features like automatic belt tensioning and input shaping. These improvements drastically reduce common issues like layer shifting. However, no printer is perfect. Environmental factors, user maintenance, and material choice still play critical roles. Even the best machines need regular calibration and care to maintain their award-winning performance.
What printer features help prevent warping in top-rated 3D printers?
Top-tier printers often include:
- Heated Build Plates: Maintain consistent bed temperature to reduce shrinkage.
- Enclosures or Optional Enclosures: Stabilize ambient temperature and block drafts.
- Advanced Bed Leveling Systems: Automatic mesh bed leveling ensures perfect first-layer adhesion.
- Flexible Build Surfaces: Some printers use PEI sheets or textured surfaces that improve adhesion without adhesives.
- Filament Dryers and Enclosures: Keep filament moisture-free, which helps maintain consistent extrusion and reduces warping.
For example, the Creality CR-6 SE features a flexible magnetic bed and auto-leveling, which users report significantly reduces warping issues.
How do advanced settings on the best 3D printers reduce common print failures?
Advanced firmware and slicer settings like input shaping, linear advance, and pressure advance allow the printer to anticipate and compensate for mechanical vibrations and pressure fluctuations. This results in:
- Reduced layer shifting by smoothing out sudden movements.
- Sharper corners and consistent extrusion, minimizing blobs and zits.
- Better control over filament flow, reducing stringing and under-extrusion.
These features require firmware like Klipper or the latest Marlin builds and compatible slicers. While they add complexity, they offer a substantial boost in print quality and reliability.
Is maintenance different for high-performance 3D printers to avoid issues?
Maintenance fundamentals remain the same across all printers: clean, lubricate, calibrate, and inspect regularly. However, high-performance printers often have:
- More complex electronics and sensors requiring firmware updates and occasional recalibration.
- Additional moving parts like dual Z-axis screws or linear rails that need specialized lubrication.
- Higher precision components that demand more careful handling to avoid damage.
Owners of premium machines often follow stricter maintenance schedules and may use diagnostic software tools to monitor printer health. But the core principle stands: consistent maintenance prevents most common issues.
Additional FAQs
How often should I calibrate my printer to avoid layer shifting?
We recommend checking belt tension and bed leveling before every print and performing a full calibration (including E-steps and axis calibration) monthly or after significant printer moves.
Can filament quality cause layer shifting or warping?
Absolutely! Poor-quality filament may have inconsistent diameter or moisture content, leading to extrusion problems that can indirectly cause layer shifts or warping. Always use reputable brands and store filament properly.
What’s the best way to clean a clogged nozzle?
A “cold pull” method using nylon filament is highly effective. Heat the nozzle to printing temperature, push nylon filament through, then cool it slightly and pull it out. This removes debris inside the nozzle.
📖 Reference Links and Credible Sources
- Sovol3D: Fixing 3D Printer Layer Shifting with Easy Step-by-Step Solutions
- Wevolver: Common 3D Printing Problems and Solutions
- Simplify3D: Print Quality Troubleshooting Guide
- Prusa Research: Official Website
- Creality: Official Website
- Bambu Lab: Official Website
- Magigoo Adhesive: Official Website
- Ultimaker Cura: Official Website
- PrusaSlicer: Official Website
- Simplify3D: Official Website
For more expert insights and reviews, visit our 3D Printer Reviews and 3D Printer Brands categories at Best 3D Printer™.