Support our educational content for free when you purchase through links on our site. Learn more
🖨️ What Kind of 3D Printer Is Best for Figures? 7 Top Picks (2026)


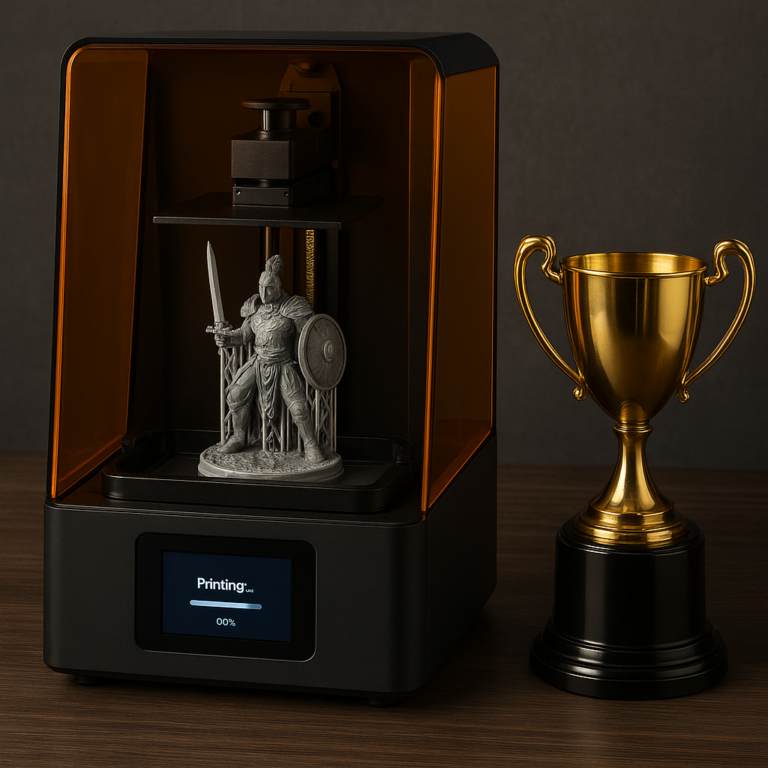
For highly detailed miniatures and collectible figures, a resin printer is usually best; for large, durable figures, multicolor prints, and cosplay props, choose FDM. The right machine depends on what you want to print—and how much cleanup you’re willing to do after the printer finishes.
We’ve watched first-time makers fall for a gorgeous miniature, then discover that its tiny sword needs delicate support removal and a careful paint job. That’s the trade-off: resin captures fine details beautifully, while FDM is often more practical for larger pieces you’ll handle, customize, or build in color.
Below, we compare seven figure-friendly printers, explain resin versus FDM, and cover the setup, safety, and finishing steps that turn a promising print into a shelf-worthy one. ✨
Key Takeaways
- Choose resin for fine detail: It’s usually the best fit for miniatures, anime figures, and smooth collectible surfaces.
- Choose FDM for size and versatility: It’s a practical choice for large figures, action figures, multicolor models, and cosplay props.
- Match the printer to your models: Build volume, material compatibility, detail, and replacement-part availability matter more than a big resolution number alone.
- Plan for the full workflow: Resin needs careful handling, washing, and curing; FDM figures may need support removal, sanding, and painting.
- Our figure-printing picks: The Elegoo Saturn 4 Ultra 16K and Mars 5 Ultra suit resin detail; the Bambu Lab P1S and A1 Combo suit different FDM projects.
👉 Shop figure-printing picks:
- Elegoo Saturn 4 Ultra 16K: Amazon | Elegoo Official
- Elegoo Mars 5 Ultra: Amazon | Elegoo Official
- Bambu Lab P1S: Amazon | Bambu Lab Official
- Bambu Lab A1 Combo: Amazon | Bambu Lab Official
Table of Contents
- ⚡️ Quick Tips and Facts: Choosing a 3D Printer for Figures
- 🧭 How 3D Printing for Figures Has Changed
- 🎯 Best 3D Printers for Figures by Use Case
- Best Overall Resin Printer: Elegoo Saturn 4 Ultra 16K
- Best Budget Resin Printer: Elegoo Mars 5 Ultra
- Best for Batch-Printing Figures: Anycubic Photon Mono M7 Max
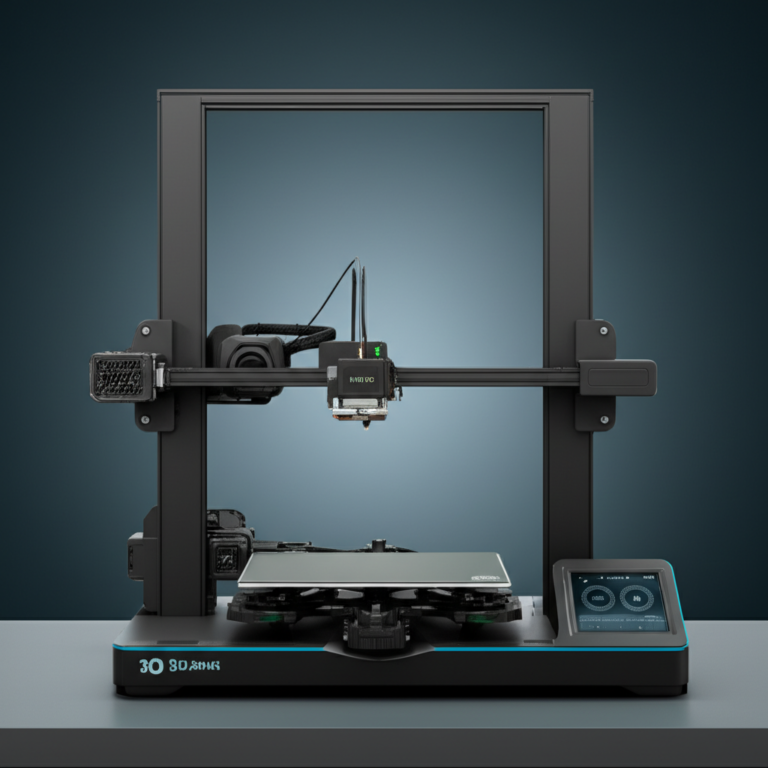
- Best FDM Printer for Large Figures and Props: Bambu Lab P1S
- Best Multicolor FDM Printer: Bambu Lab A1 Combo
- Best Compact Beginner Printer: Bambu Lab A1 mini
- Best Multicolor Printer for Less Purge Waste: Snapmaker U1
- ⚖️ Resin vs. FDM: The Big Decision for Figure Printing
- Surface Detail, Layer Lines, and Fine Features
- Build Volume, Strength, and Print Size
- Resin Handling, Ventilation, and Safety
- Print Cleanup, Curing, and Post-Processing
- 🧩 Best 3D Printer for Miniatures, D&D, and Tabletop Gaming
- Printing Tiny Faces, Weapons, and Textured Armor
- Resin vs. FDM for Miniatures
- 🎨 Best 3D Printer for Anime Figures and Collectible Figurines
- Printing a Figure in One Piece or Separate Parts
- Supports, Hollowing, and Drain Holes
- Painting and Finishing Your Printed Figure
- 🦾 Best 3D Printer for Action Figures and Moving Parts
- Choosing Materials for Strength and Flexibility
- Designing Joints, Pegs, and Tolerances
- 🛡️ Best 3D Printer for Cosplay Props, Swords, and Anime Weapons
- When to Choose a Large-Format FDM Printer
- Splitting, Joining, and Reinforcing Large Prints
- 💰 What a Figure-Printing Setup Really Needs
- Resin Printer Accessories and Safety Equipment
- Filament, Resin, Washers, and Curing Stations
- Software, Tools, and Ongoing Costs
- ⚙️ Figure Printing Settings: From First Layer to Fine Detail
- Resin Exposure, Layer Height, and Orientation
- FDM Nozzles, Layer Height, and Retraction
- Support Settings and Bed Adhesion
- 🧯 Common Figure-Printing Problems and Fixes
- Failed Prints, Warping, and Weak Details
- Visible Layer Lines, String, and Rough Surfaces
- Brittle Resin, Broken Limbs, and Loose Joints
- 📁 Where to Find Legal 3D Models for Figures
- Free and Paid Figure-Model Libraries
- Copyright, Fan Art, and Commercial Use
- ❓ 3D Printers for Figures: Frequently Asked Questions
- What is the best 3D printer for figurines?
- Can you 3D print anime figures?
- Is resin or FDM better for anime figures?
- What resin is best for anime figures?
- Is a resin printer good for beginners?
- How long does it take to 3D print a figure?
- Do you need a large printer for anime weapons?
- 🏁 Conclusion
- 🔗 Recommended Links
- 📚 Reference Links
⚡️ Quick Tips and Facts: Choosing a 3D Printer for Figures
Short answer: For finely detailed, static display figures, choose a resin MSLA printer. For large figures, sturdy action figures, multicolor prints, or cosplay props, choose an FDM filament printer.
| What you want to print | Best printer type | Why it fits | Main trade-off |
|---|---|---|---|
| Detailed collectible figures and busts | Resin (MSLA) | Fine facial features and smooth surfaces | Requires careful handling, washing, and curing |
| 28–32 mm tabletop miniatures | Resin (MSLA) | Captures tiny details and small text well | Small parts can be brittle |
| Large statues and dioramas | FDM | Larger build volumes and practical material use | Layer lines and supports need finishing |
| Articulated or frequently handled figures | FDM | Often more forgiving under everyday handling | Less crisp detail at miniature scale |
| Multicolor figures and accessories | FDM with a multicolor system | Color changes can reduce painting | Purge waste and extra setup vary by system |
| Anime swords and cosplay props | Large-format FDM | Prints large parts, often as joined sections | Sanding, filling, and painting take time |
A few useful rules of thumb:
- ✅ Choose resin when surface detail matters most.
- ✅ Choose FDM when size, strength, or ease of handling matters more.
- ✅ Pick a printer around your actual model dimensions, not a “bigger must better” instinct.
- ❌ Don’t treat resin and filament printers as interchangeable. They solve different problems, and each asks for different safety and finishing habits.
- ✅ Budget for the whole workflow: printer, material, supports, cleanup tools, ventilation, and finishing supplies.
- ✅ Slicing is required: a model file such as STL needs slicer software to turn its geometry into printer instructions. The Bambu Lab community discussion about figure printers makes this practical point clearly.
We’ve seen new hobbyists buy a printer based on a spectacular miniature photo, then discover the unglamorous truth: that tiny hero also needs supports removed, a wash, a cure, and a paint job. The printer is only one member of the cast.
🧭 How 3D Printing for Figures Has Changed
3D printing used to feel like a workshop hobby where every successful print came with a side order of troubleshooting. Modern machines have made setup and routine printing much more approachable, but the best printer still depends on what kind of figure you want.
The first video embedded in this article makes a similar point: today’s printers can be easier to start with, and ecosystems such as Bambu Lab pair printers with slicer software, phone-based monitoring, model libraries, and learning resources. That convenience is useful, especially for first-time FDM users. The same video highlights MakerWorld, Bambu Handy, and free courses through Bambu Lab Academy.
But convenience doesn’t erase the difference between technologies. A beginner can launch an FDM print with relatively little preparation; resin printing still requires a more careful routine around liquid resin, gloves, washing, curing, and ventilation. Resin’s additional steps buy a surface finish and fine detail that filament usually struggles to match at miniature scale.
The three figure-printing workflows
| Workflow | Printer technology | Typical strengths | Typical finishing |
|---|---|---|---|
| Fine-detail collectible | MSLA resin | Faces, hair, armor, tiny features | Wash, remove supports, cure, sand or paint |
| Large-format display piece | FDM filament | Larger parts, accessible materials | Remove supports, sand, fill, prime, paint |
| Durable or multicolor figure | FDM filament | Handling, color options, functional parts | Remove supports; optional sanding and painting |
3D printing also has broader uses beyond shelf figures. Schools, hobby workshops, and small businesses use it for models, prototypes, props, and functional objects. If you’re exploring those applications, browse our guides to 3D printers for education, 3D printers for small businesses, and 3D printing industry news.
🎯 Best 3D Printers for Figures by Use Case
These are use-case picks, not a claim that one printer is best for everybody. We’re separating resin and FDM because comparing their detail, safety, and durability as if they were the same tool would be like judging a paintbrush against a saw.
The products below represent different priorities: detail, build volume, beginner comfort, or multicolor output. For current models and hands-on comparisons, see our 3D printer reviews.
Best Overall Resin Printer: Elegoo Saturn 4 Ultra 16K
| Aspect | Rating (1–10) |
|---|---|
| Fine detail | 10 |
| Build volume for figures | 9 |
| Ease of use | 8 |
| Batch-printing potential | 9 |
| Material flexibility | 7 |
| Post-processing convenience | 5 |
| Overall for display figures | 9 |
The Elegoo Saturn 4 Ultra 16K is a strong fit if you want sharp faces, fine costume details, and room to arrange multiple smaller models one build plate. Its 16K screen is intended for detailed resin work, but the resolution label alone doesn’t guarantee a perfect print: model quality, orientation, exposure calibration, supports, resin, and post-processing all matter.
Why we like it for figures
- High-detail resin printing suits display statues, busts, and miniatures.
- The larger build area makes it more practical for batches than a compact entry-level resin printer.
- Resin models can have smooth-looking surfaces that need less layer-line cleanup than typical FDM prints.
What to consider
- You still need a safe, repeatable workflow for handling uncured resin.
- Large resin figures may need to be hollowed, supported, and oriented carefully.
- A high-resolution screen doesn’t eliminate visible support marks or the need for painting.
Best for: collectors and miniature painters who prioritize surface detail over convenience.
Best Budget Resin Printer: Elegoo Mars 5 Ultra
| Aspect | Rating (1–10) |
|---|---|
| Fine detail | 9 |
| Build volume for figures | 6 |
| Ease of use | 8 |
| Batch-printing potential | 6 |
| Material flexibility | 7 |
| Post-processing convenience | 5 |
| Overall for entry-level resin figures | 8 |
The Elegoo Mars 5 Ultra is a compact option for detailed figures when you don’t need to print several large models at once. Its 9K-class screen can produce crisp small models; the practical compromise is build area, not a lack of usefulness for miniatures.
Why it makes sense
- A sensible starting point for tabletop models, busts, and smaller collectibles.
- Smaller print area can mean less unused build space when you’re printing a few miniatures.
- Resin detail is still the key advantage over most standard FDM setups at this scale.
Drawbacks
- Large figures may need to be split into parts.
- The same washing, curing, ventilation, and resin-safety requirements apply as with larger machines.
- If you plan to print squads or multiple large models regularly, a bigger build plate may save time.
Best for: a hobbyist who wants detailed resin prints but doesn’t need a large batch-printing bed.
Best for Batch-Printing Figures: Anycubic Photon Mono M7 Max
| Aspect | Rating (1–10) |
|---|---|
| Fine detail | 8 |
| Build volume for figures | 10 |
| Ease of use | 7 |
| Batch-printing potential | 10 |
| Material flexibility | 7 |
| Post-processing convenience | 5 |
| Overall for high-volume resin figures | 9 |
The Anycubic Photon Mono M7 Max is aimed at users who value a very large resin build area for batches, large models, or fewer split parts. Its spacious build dimensions—listed by Anycubic as 298 × 164 × 300 mm—give you room to arrange multiple figures or print larger pieces.
The trade-off is that a bigger build area does not automatically mean finer detail than a smaller, higher-density screen. If your priority is close-up facial detail one small character, compare the actual screen pixel size and print results—not just the “7K” or “16K” headline.
Best for: figure painters, makers, and small production workflows where build capacity matters. For business-oriented printing advice, see our small-business printer guides.
Best FDM Printer for Large Figures and Props: Bambu Lab P1S
| Aspect | Rating (1–10) |
|---|---|
| Fine detail | 7 |
| Build volume for figures | 7 |
| Ease of use | 8 |
| Large-part practicality | 8 |
| Material flexibility | 8 |
| Post-processing convenience | 7 |
| Overall for large FDM figures and props | 8 |
The Bambu Lab P1S is a practical enclosed FDM printer for larger figures, display pieces, and props. It won’t reproduce tiny facial features as cleanly as a resin printer, but it can print larger, more robust sections and works with widely used filament workflows.
The P1S also makes sense when you expect to print more than display figurines: organizers, brackets, costume parts, and other practical models. Its enclosure is useful for certain materials, though you should still follow material-specific ventilation and printer guidance.
Good fit if you want:
- Larger models or cosplay components.
- An FDM ecosystem with automated features and an enclosed design.
- A printer that can handle general-purpose projects as well as figures.
Not the right pick if: your main goal is tiny, paint-ready miniatures with crisp facial detail.
Best Multicolor FDM Printer: Bambu Lab A1 Combo
| Aspect | Rating (1–10) |
|---|---|
| Fine detail | 7 |
| Build volume for figures | 7 |
| Ease of use | 9 |
| Multicolor convenience | 8 |
| Material flexibility | 6 |
| Post-processing convenience | 8 |
| Overall for multicolor figures | 8 |
The Bambu Lab A1 Combo pairs an FDM printer with the AMS lite material system, allowing supported multicolor workflows. That can be great for colorful display figures, gifts, accessories, and chibi-style models—especially if you’d rather print color than paint every panel.
Multicolor filament printing has a familiar catch: changing materials can generate purge waste, and detailed color transitions can add print time. For a sharp, tiny face, resin and paint may still win. For a larger cartoon-style figure with bold color blocks, the A1 Combo is a much more convenient fit.
Best for: users who value automatic color changes and a straightforward FDM workflow more than resin-level detail.
Best Compact Beginner Printer: Bambu Lab A1 mini
| Aspect | Rating (1–10) |
|---|---|
| Fine detail | 6 |
| Build volume for figures | 5 |
| Ease of use | 9 |
| Beginner friendliness | 9 |
| Material flexibility | 6 |
| Post-processing convenience | 8 |
| Overall for beginner figure printing | 8 |
The Bambu Lab A1 mini is a compact FDM option for learning the basics and printing smaller figures, chibi models, and accessories. It’s not a substitute for a resin machine if your target is tiny, high-detail tabletop miniatures, but it can make the early learning curve less intimidating.
The first video’s take on beginner-friendly printing is worth considering here: a well-integrated printer, app, slicer, and model library can help reduce the number of separate things you need to learn at once. That convenience is real—but it doesn’t change the physical limits of FDM detail or the printer’s smaller build area.
Best for: beginners, compact workspaces, and users who want a general-purpose printer that can also make small figures.
Best Multicolor Printer for Less Purge Waste: Snapmaker U1
| Aspect | Rating (1–10) |
|---|---|
| Fine detail | 7 |
| Build volume for figures | 8 |
| Ease of use | 7 |
| Multicolor workflow | 8 |
| Material flexibility | 7 |
| Post-processing convenience | 8 |
| Overall for multicolor FDM figures | 8 |
The Snapmaker U1 uses multiple toolheads for supported multicolor printing workflows. Independent toolheads can reduce some of the material purged during filament swaps compared with systems that feed several filaments through one nozzle. Actual waste depends on the model, color transitions, and slicer settings, so treat “less waste” as a workflow advantage—not a guarantee of a fixed reduction on every print.
Why consider it
- Multicolor FDM figures without relying on manual painting for every color.
- A larger build area than many compact beginner machines.
- Toolhead changes can be useful for frequent multicolor jobs.
Limitations
- Still an FDM printer: small details and faces won’t have resin-like surface quality.
- Multicolor prints need careful slicing and may take longer than single-color prints.
- As with any newer or more specialized system, check current firmware, material compatibility, replacement parts, and support before buying.
Shopping links
- Elegoo Saturn 4 Ultra 16K: Amazon | Elegoo Official
- Elegoo Mars 5 Ultra: Amazon | Elegoo Official
- Anycubic Photon Mono M7 Max: Amazon | Anycubic Official
- Bambu Lab P1S: Amazon | Bambu Lab Official
- Bambu Lab A1 Combo: Amazon | Bambu Lab Official
- Bambu Lab A1 mini: Amazon | Bambu Lab Official
- Snapmaker U1: Amazon | Snapmaker Official
⚖️ Resin vs. FDM: The Big Decision for Figure Printing
Resin printers cure liquid photopolymer layer by layer; FDM printers melt and lay down filament through a nozzle. The difference shows up in detail, size, handling, cleanup, and the shape of your workspace.
One competitor summarizes the choice as “Resin for the figurines you’ll display, FDM for the weapons and action figures you’ll actually carry.” That’s a useful shorthand, not a law of physics. A resin figure can be made tougher with suitable materials and design choices; a carefully tuned FDM printer can make impressive figures. But the broad distinction holds: resin generally wins tiny surface detail, while FDM is usually more practical for larger or functional prints.
| Factor | Resin (MSLA) | FDM |
|---|---|---|
| Fine facial detail | Excellent | Fair to good, depending on nozzle and settings |
| Surface appearance | Smooth, fine details | Layer lines usually more visible |
| Typical figure scale | Miniatures to medium collectibles | Medium figures to large props |
| Material handling | Liquid resin requires careful handling | Filament is generally simpler to store and use |
| Cleanup | Wash and UV cure | Remove supports; sand or fill as needed |
| Durability | Depends on resin; standard resin may be brittle | Depends on filament and print design |
| Color workflow | Usually paint after curing | Multicolor systems can print color directly |
| Best fit | Display-quality detail | Size, practical strength, and versatility |
Surface Detail, Layer Lines, and Fine Features
Resin printing is usually the better choice when the figure has small eyes, thin armor trim, sculpted hair strands, or tiny textures. It cures fine layers across the build area, helping preserve details that a typical FDM nozzle may blur or simplify.
FDM can improve with a smaller nozzle and lower layer height. The Bambu Lab forum discussion notes that a 0.2 mm nozzle can produce “some pretty serious detail” on machines such as the A1, A1 mini, P1S, and X1 Carbon. That’s a useful perspective for users who prefer easier filament handling—but it doesn’t mean FDM and resin become identical. A 0.2 mm nozzle can improve detail while increasing print time and making extrusion more sensitive to clogs and calibration.
Trust the intended scale and the actual print sample. A printer advertised with a large resolution number may still be a poor fit for a specific model if the mesh is crude, the supports scar the face, or the figure is too large for the build plate.
Build Volume, Strength, and Print Size
A bigger build volume helps with large statues, dioramas, and cosplay props. But bigger is only useful if your figure actually needs it. Many collectible designs are intended to be printed as separate parts, making a smaller machine perfectly capable of producing a large finished figure.
Consider the model’s weakest features, too. Thin resin ankles, weapon shafts, and wrist joints can be vulnerable to impact. FDM may be more suitable for pieces that will be held, moved, or repeatedly assembled, though design and material choice still matter.
A figure intended for a shelf has different needs from one you expect to hand to a child. For handled parts, choose material and wall thickness for the job rather than assuming the printer alone determines strength.
Resin Handling, Ventilation, and Safety
Resin printing can produce excellent detail, but uncured resin is a chemical-handling task, not a “set it and forget it” hobby. Follow the manufacturer’s safety data sheet and printer guidance, use suitable gloves and eye protection, prevent skin contact, and ensure appropriate ventilation. Review official safety information from the National Institute for Occupational Safety and Health and your resin manufacturer’s SDS before setting up.
Good habits include:
- Keep liquid resin away from skin, pets, food, and children.
- Wear chemical-resistant gloves when handling uncured resin and contaminated parts.
- Work in an appropriately ventilated area.
- Keep a dedicated space for resin, tools, and cleanup.
- Handle contaminated wipes, gloves, and wash liquid according to local rules and product guidance.
- Never pour uncured resin or contaminated cleaning liquid down a household drain.
FDM avoids liquid photopolymer cleanup, but it isn’t automatically emission-free. Some filament materials can release airborne particles and volatile compounds during printing. Choose materials and ventilation practices appropriate to your printer and room; the EPA’s overview of 3D printer emissions is a useful starting point.
Print Cleanup, Curing, and Post-Processing
Resin workflow
- Remove the build plate carefully.
- Drain excess resin back into its container when appropriate.
- Wash the printed part using the recommended cleaning process.
- Remove supports at the stage recommended for your resin and model.
- Let the part dry fully.
- UV-cure it according to the resin manufacturer’s directions.
- Sand support marks, prime, and paint if desired.
FDM workflow
- Remove the print after the bed and part are safe to handle.
- Remove supports and strings.
- Trim rough edges and inspect joints.
- Sand or fill visible layer lines if you want a smoother finish.
- Prime and paint, or leave the filament surface as printed.
This is where the competing advice can seem to disagree. One guide stresses resin’s cleaner detail; a community commenter values FDM’s flexibility and more approachable use. Both are describing real priorities. If you rank detail first, resin is compelling. If cleanup, handling, and all-purpose use are higher priorities, FDM may be the more satisfying choice.
🧩 Best 3D Printer for Miniatures, D&D, and Tabletop Gaming
For 28–32 mm tabletop figures, resin is usually the better match. Tiny expressions, chainmail, scales, straps, and weapon edges put a premium on detail. FDM can still make terrain, large monsters, scenery, and chunky tokens, but delicate miniature features are where resin’s strengths are easiest to see.
| Tabletop project | Suggested approach | Why |
|---|---|---|
| Player characters and small monsters | Resin MSLA | Fine details at miniature scale |
| Squads of similar miniatures | Resin with a larger build plate | More space for supported batches |
| Large monsters and display models | Resin or FDM, depending on size | Detail favors resin; scale may favor FDM |
| Terrain, buildings, and scatter | FDM | Large, practical parts suit filament |
| Frequently handled game pieces | Tougher resin or FDM | Material and design should resist wear |
Printing Tiny Faces, Weapons, and Textured Armor
For small miniatures, details can disappear because of more than printer resolution. Model sculpt quality, scale, support placement, exposure calibration, and orientation all affect the result.
Try this sequence:
- Choose a model designed for printing at your intended scale. A sculpt optimized for a large statue may have details too thin to survive when reduced.
- Use tested, appropriately supported files when you’re learning. A good support layout can save a print; a poor one can leave pockmarks across a face.
- Angle the model thoughtfully. Orientation affects support placement, suction forces, and which surfaces carry visible layer steps.
- Calibrate exposure for your resin and printer. Don’t assume another person’s setting will work perfectly with your setup.
- Inspect small features after washing and curing. Uncured or over-cured parts can behave differently, so follow the resin guidance.
- Paint with a planned scale in mind. A thin primer coat preserves more tiny detail than a heavy one.
A common beginner surprise: the mini printed beautifully, but its sword snapped while supports were being removed. That’s not always a printer failure. It may be a thin model feature, a brittle material, or a support-removal technique that needs gentler handling.
Resin vs. FDM for Miniatures
Resin is our default recommendation for detailed tabletop figures. FDM is more attractive for terrain, bases, bulky characters, and users who want one printer for a wider range of workshop jobs.
A competing guide recommends resin for 28–32 mm miniatures and suggests ABS-like resin for models that will be handled. That’s sensible, but no resin name guarantees toughness: formulations differ, and mechanical performance depends on curing, geometry, and manufacturer instructions. Check the technical data sheet and test parts that will face repeated handling.
If using FDM for miniatures:
- Consider a smaller nozzle if your printer supports it.
- Reduce layer height carefully and expect longer print times.
- Use a model with thicker details designed for FDM.
- Expect to do more support cleanup and surface finishing.
- Use the filament type recommended by the printer manufacturer for the job.
🎨 Best 3D Printer for Anime Figures and Collectible Figurines
Anime figures combine smooth faces, sharply defined hair, flowing costumes, and expressive poses. For a small or medium shelf figure, resin is usually the easiest route to a crisp sculpt. For a large statue, a multicolor character, or a figure you plan to handle, FDM may be more practical.
| Figure goal | Strong starting point | Key compromise |
|---|---|---|
| Fine face and hair detail | Resin MSLA | Requires careful post-processing |
| Large statue or oversized bust | Large-format FDM or large resin | Large parts need splitting, support planning, or both |
| Printed color blocks | FDM multicolor system | More slicing complexity and possible purge waste |
| Easy-to-paint collectible | Resin | Resin handling and support marks |
| Durable accessory or prop | FDM | More visible layer lines before finishing |
Printing a Figure in One Piece or Separate Parts
Printing a character in one piece sounds convenient until the pose creates unsupported overhangs, awkward support marks, or a model larger than the build plate. Splitting a figure can improve print quality and make assembly easier, especially for hair, limbs, weapons, bases, and large costume pieces.
A practical decision process:
- Measure the model’s bounding box in your slicer before printing.
- Check the printer’s usable build volume, not just the nominal dimensions.
- Look for natural seams at joints, clothing edges, hair, or accessories.
- Avoid placing seams across highly visible faces unless you’re comfortable with filling and sanding.
- Add alignment features such as pegs, sockets, or keyed shapes where your model or design software allows.
- Dry-fit before gluing or painting.
For resin, hollowing a large model can reduce material use, but it must be designed and oriented carefully. Trapped uncured resin inside a hollow print is a serious failure mode, so plan drainage openings and follow resin-printer guidance.
Supports, Hollowing, and Drain Holes
Supports hold overhangs and islands during printing. More support is not always better: supports placed on a face or smooth costume panel can leave marks that are tedious to remove.
- Place supports on less-visible surfaces where possible.
- Use the slicer’s island-detection and support-preview tools.
- Inspect the layers where small features begin.
- For hollow resin models, ensure suitable drainage and cleaning access.
- Don’t remove supports aggressively from thin parts.
One of our team’s most memorable first-resin lessons was a pristine-looking front view hiding a row of support scars on the back of a character’s hair. The print wasn’t ruined, but the model’s orientation had chosen the worst possible place to make the cleanup “easy.” Previewing the support contact points would have saved the sanding session.
Painting and Finishing Your Printed Figure
A good finish begins before paint. Remove supports carefully, sand or fill visible marks, and use a primer suitable for the material. For tiny miniatures, thin layers help preserve detail; for large FDM figures, filler primer and repeated sanding can smooth layer lines more effectively.
A simple finishing sequence:
- Clean and fully post-process the print.
- Remove support nubs and sharp edges.
- Sand with progressively finer abrasives where suitable.
- Apply a compatible primer in light coats.
- Paint broad areas before tiny details.
- Seal the finished piece with an appropriate clear coat if needed.
For more on filament, resin, and related maker products, explore our 3D printer brand guides.
🦾 Best 3D Printer for Action Figures and Moving Parts
If a figure will bend, twist, or get passed around, the material and design matter as much as the printer. Resin can capture elaborate details, but some standard formulations are brittle. FDM is often a safer starting point for functional joints and pieces that need repeated handling, though a poorly designed FDM joint can still snap or wear out.
| Use | Material direction | Design reminder |
|---|---|---|
| Static display character | Standard resin or PLA | Detail and finish take priority |
| Handled display figure | Tough or ABS-like resin, or FDM | Test small parts before committing |
| Articulated joints | FDM is often practical | Clearance and layer orientation matter |
| Flexible accessories | TPU FDM or suitable flexible resin | Check printer and material compatibility |
| Large handheld prop | FDM | Reinforce long, narrow sections |
Choosing Materials for Strength and Flexibility
For FDM, PLA is a straightforward starting point for display models and learning. PETG can offer a useful balance for parts that need more impact tolerance, while TPU can provide flexibility if the printer can handle it. Material choice must match the printer’s capabilities and the part’s actual demands.
For resin, standard formulas often favor detail and appearance over impact resistance. Tough or ABS-like resins may better suited to parts that will be handled, but check the resin manufacturer’s specifications rather than relying on the label alone. Some flexible resins are possible, though they require compatible settings and may behave differently from flexible filament.
No material makes a fragile design magically durable. Thin ankles, narrow pegs, and sharp, unsupported weapons remain weak points.
Designing Joints, Pegs, and Tolerances
Moving parts need clearance. A peg that fits perfectly in a digital model may bind after printing because of shrinkage, surface roughness, or printer calibration.
- Print a small tolerance test before making a whole articulated figure.
- Orient joints to avoid layers separating under their main direction of stress.
- Make connection points thick enough to handle repeated movement.
- Use replaceable pins or separate connectors for parts that may wear.
- Avoid forcing brittle resin joints together; test the fit gently.
The right clearance depends on the printer, material, orientation, and slicer. Treat a manufacturer’s or community member’s tolerance value as a starting point, not a universal number.
🛡️ Best 3D Printer for Cosplay Props, Swords, and Anime Weapons
For large weapons and cosplay props, FDM is usually the practical choice. A long sword, staff, or oversized accessory can be split into sections, printed on a large bed, assembled, reinforced, and finished. Resin is usually better for decorative details than for a long prop that needs to survive handling.
When to Choose a Large-Format FDM Printer
Choose a larger FDM printer if you want to reduce the number of pieces in a prop or print bigger costume components. Before buying, measure the model’s longest dimension and check how it can be oriented on the build plate.
Questions to ask:
- Can the prop fit diagonally as well as straight?
- Does it need to be printed upright, flat, or split?
- Will your chosen filament work with the printer?
- Is the workspace large enough for the printer and the completed parts?
- Can the finished piece be safely carried and used as intended?
Bigger build volume can reduce assembly, but it doesn’t remove finishing work. Long prints still need good bed adhesion, sensible orientation, and careful inspection.
Splitting, Joining, and Reinforcing Large Prints
A reliable prop workflow looks like this:
- Scale and split the model into pieces that fit the printer.
- Add alignment joints so sections assemble straight.
- Print small test connectors before printing every full-size part.
- Use a joining method compatible with the material, following adhesive and safety instructions.
- Reinforce long or load-bearing sections where the design allows.
- Fill seams, sand, prime, and paint for a smooth finish.
- Check the finished prop for sharp edges, loose joints, and unsafe break points.
A blade-shaped prop should be treated as a costume object, not a real weapon. Check event rules and transport requirements before taking one to a convention.
💰 What a Figure-Printing Setup Really Needs
The printer is the headline purchase, but the rest of the setup decides whether the hobby feels smooth or like a bench covered in “I’ll clean that later” cups. Plan for materials, supports, safety, tools, replacement parts, and finishing supplies.
| Setup item | Resin workflow | FDM workflow |
|---|---|---|
| Printer | MSLA resin printer | FDM filament printer |
| Print material | Photopolymer resin | PLA, PETG, TPU, or compatible filament |
| Cleanup | Washing supplies and containers | Snips, scraper, and support-removal tools |
| Post-processing | UV curing equipment or suitable process | Sandpaper, filler, and primer if desired |
| Safety | Gloves, eye protection, ventilation, spill control | Ventilation appropriate to material and workspace |
| Software | Resin slicer | FDM slicer |
| Ongoing needs | Resin, films/screens, contaminated-waste handling | Filament, nozzles, build-surface care, replacement parts |
Resin Printer Accessories and Safety Equipment
A resin setup generally needs:
- Gloves appropriate for handling uncured resin.
- Eye protection and a tidy, dedicated work surface.
- A suitable cleaning method recommended by the resin manufacturer.
- UV curing equipment or another appropriate curing process.
- Tools for support removal and cleanup.
- A plan for storing resin and handling contaminated waste.
- Adequate ventilation for the room and products being used.
Read the manufacturer’s safety documentation before printing. The U.S. EPA’s research on 3D printing emissions is useful context, but it does not replace the SDS for the specific resin or cleaning product.
Filament, Resin, Washers, and Curing Stations
FDM uses common filament formats, with PLA often the easiest first material. Resin selection should account for the type of figure, desired finish, toughness, and printer compatibility. A wash-and-cure station can make resin post-processing more organized, but it doesn’t replace gloves, ventilation, careful storage, or proper waste handling.
Before purchasing consumables, check:
- Whether the material is supported by your printer.
- Whether the printer manufacturer publishes a profile or recommended settings.
- What cleaning and curing process the material requires.
- Whether replacement build surfaces, screens, films, and nozzles are available.
- How you’ll store unused material safely.
Software, Tools, and Ongoing Costs
A slicer converts a 3D model into the instructions a printer follows. Popular options include Bambu Studio, UltiMaker Cura, PrusaSlicer, CHITUBOX, and Lychee Slicer. Compatibility varies, so confirm that your slicer supports your printer and file workflow.
The ongoing bill is not just material. FDM users may replace nozzles and build surfaces; resin users may replace wear parts and manage contaminated cleaning supplies. Both workflows benefit from cutters, calipers, sanding tools, and a little patience.
⚙️ Figure Printing Settings: From First Layer to Fine Detail
There isn’t one universal “anime figure profile.” A setting that works for one printer, model, and material may fail on another. Use the printer and material manufacturers’ documentation as your starting point, then test small samples.
Resin Exposure, Layer Height, and Orientation
Follow this order:
- Select the correct printer profile and resin profile.
- Calibrate exposure using a test model recommended for your printer or slicer.
- Choose a layer height appropriate for the detail and print time you need.
- Orient the model to reduce troublesome overhangs and protect visible surfaces.
- Inspect supports and islands before starting.
- Review the estimated print and material use.
- After printing, follow the resin’s specified washing and curing instructions.
Resin screens have a fixed pixel grid in the XY plane; layer height describes the Z direction. These are different measures, so a screen’s “K” resolution alone does not tell the whole print-quality story. The Phrozen guide to 3D printing terminology and your printer documentation can help explain manufacturer-specific specifications.
FDM Nozzles, Layer Height, and Retraction
For FDM figures:
- Use the nozzle size and filament profile recommended for your printer.
- A smaller nozzle may preserve finer details but can increase print time and clog sensitivity.
- Lower layer height can make curved surfaces look smoother, but it won’t erase every layer line.
- Tune temperature and retraction to the filament and printer rather than copying a random profile.
- Use a strong first layer and verify that the model is firmly attached before a long print.
- Consider whether supports will damage visible facial or costume surfaces.
If you’re using multicolor printing, preview material changes and purge behavior. A figure with many small color patches can consume considerably more time and material than a simple two-color model.
Support Settings and Bed Adhesion
Supports are a compromise: they prevent droping and failed overhangs, but leave contact marks and take time to remove.
Before printing:
- Preview the model layer by layer.
- Look for islands in resin slices and unsupported overhangs in FDM slices.
- Move support contact points away from faces and smooth display surfaces where possible.
- Check that the base or raft adheres properly.
- Confirm the model fits within the printer’s usable area.
A failed print often starts in the preview, not halfway through the job. Spend the extra minute looking at it; your future self will appreciate the gesture.
🧯 Common Figure-Printing Problems and Fixes
| Symptom | Possible cause | First things to check |
|---|---|---|
| Resin print missing parts | Poor support, exposure issue, or failed adhesion | Slicer preview, calibration, build plate, resin condition |
| Warped FDM base | Bed adhesion, cooling, or material behavior | First layer, bed surface, room drafts, material profile |
| Face covered in marks | Supports placed on visible surfaces | Orientation and support contact locations |
| Fine detail disappears | Model too small, settings off, or sculpt not scale-optimized | Scale, exposure/nozzle, layer height, model quality |
| String on FDM figure | Temperature or retraction mismatch | Filament profile and material dryness |
| Britle thin parts | Material or geometry unsuitable for handling | Resin/filament choice, wall thickness, part orientation |
| Joint won’t fit | Tolerance or calibration issue | Small test print, alignment, dimensional calibration |
Failed Prints, Warping, and Weak Details
Resin: inspect supports, islands, exposure calibration, and plate adhesion. Confirm the resin is mixed and handled according to its instructions.
FDM: inspect the first layer, build surface, cooling, and material profile. A model that loses adhesion may be caused by a dirty build surface or incorrect first-layer setup rather than a defective printer.
For both technologies, check the model itself. A mesh can contain thin walls, disconnected parts, or unsupported features that are difficult to print reliably.
Visible Layer Lines, String, and Rough Surfaces
For FDM figures, use a suitable orientation and layer height, and decide whether sanding and primer are part of the plan. On resin figures, roughness can come from support marks, poor orientation, inadequate washing, or the model itself.
String on FDM prints often points to material or retraction settings, but don’t immediately start changing every slicer number. First check the filament’s condition, the manufacturer’s profile, and the printer’s nozzle cleanliness.
Britle Resin, Broken Limbs, and Loose Joints
Thin parts are common failure points, particularly on weapons, fingers, ankles, and wrist connections. Consider:
- Choosing a tougher material compatible with your printer.
- Increasing the thickness of fragile features in the model.
- Using separate pins or reinforced connectors.
- Handling small parts gently during support removal.
- Printing and testing a small joint before committing to a full figure.
If a figure is intended to move, test it as a mechanism—not just as a pretty print.
📁 Where to Find Legal 3D Models for Figures
You can download ready-to-print models or create your own using 3D modeling software. Model libraries often include free and paid files, but a free download is not automatically free for commercial use.
| Platform | Useful for | What to check |
|---|---|---|
| MakerWorld | Community models and Bambu-oriented workflows | License and printer compatibility |
| Printables | Community models and printable designs | Creator’s license and print notes |
| Thingiverse | Large community library | License and file quality |
| MyMiniFactory | Miniatures and artist-designed models | Membership and commercial-use terms |
| Cults3D | Paid and free models | Seller license and file details |
| Sketchfab | 3D assets, not all designed for printing | Download rights and mesh printability |
Free and Paid Figure-Model Libraries
Look for models that specify:
- Recommended scale and printer type.
- Whether supports are included.
- Whether the parts are split for assembly.
- Tested resin or filament settings.
- Print orientation and finishing suggestions.
- The license for personal or commercial use.
A file can be visually impressive but poorly suited to your printer. Inspect the mesh, scale, and support requirements before planning a long print.
Copyright, Fan Art, and Commercial Use
Anime and game characters may be protected by copyright or trademark rights. A creator’s permission to download or print a model does not necessarily grant permission to sell prints, use a character commercially, or distribute modified files. Read the model license and check applicable law; when in doubt, ask the rights holder or the model creator.
If you want to sell original figures, consider designing your own characters or licensing the rights. That’s less risky than assuming a popular fan-art file is a free business plan.
❓ 3D Printers for Figures: Frequently Asked Questions
What is the best resin 3D printer for detailed collectible figures?
For detailed collectibles, choose a resin MSLA printer with a build area suited to your figure size, a well-supported workflow, and accessible replacement parts. The Elegoo Saturn 4 Ultra 16K is a strong larger-format option; the Elegoo Mars 5 Ultra is a more compact choice for smaller projects.
The best pick depends on the model’s dimensions and how many parts you print at once. Compare the actual pixel size, usable build area, software support, and material requirements—not only the headline resolution.
Which 3D printer is best for making award-winning miniature figures?
No printer guarantees an award-winning miniature. For sculptural detail at tabletop scale, a resin printer is usually the strongest starting point, but the finished result also depends on the sculpt, supports, exposure, cleanup, paintwork, and presentation.
A practical path is to print a small test miniature, refine orientation and supports, and keep a record of successful settings. For award-level work, craftsmanship after printing matters just as much as the machine.
Is an FDM or resin 3D printer better for printing figures?
Resin is generally better for small, finely detailed display figures. FDM is generally better for larger figures, props, multicolor workflows, and parts that need practical durability.
FDM may be the better first printer for a person who wants a general-purpose machine and simpler material handling. Resin is the better match when miniatures and smooth collectible surfaces are the main goal and you’re prepared for careful handling and post-processing.
What features should you look for in a 3D printer for figures?
Prioritize:
- Build volume matched to your intended figure scale.
- Print detail and repeatability, not just a resolution headline.
- Material compatibility for display, handling, or functional parts.
- Slicer and file support for your preferred model workflow.
- Replacement parts and manufacturer documentation.
- Safety and cleanup requirements, especially for resin.
- Ease of calibration and support tools for your experience level.
What resin is best for figures that will be handled?
Choose a resin whose technical data indicates suitable toughness for your use, such as an ABS-like or tough formulation when supported by your printer. Check the specific manufacturer’s technical sheet and test small parts. Labels vary between brands, and design geometry still affects breakage.
Is a resin printer suitable for a beginner?
It can be, if you’re comfortable following safety instructions and managing washing, curing, ventilation, and contaminated waste. For someone who wants a simpler start and broader utility, FDM is often more forgiving. For someone who mainly wants detailed miniatures, resin may be worth the extra workflow.
How do you print a large anime figure on a smaller printer?
Split the model into sections that fit the usable build volume, add or use alignment joints, print test connectors, and assemble the parts after cleanup. Plan seams around natural clothing or hair boundaries where possible. Large resin models also require careful hollowing and drainage if the design calls for it.
Can multicolor FDM match resin detail on a collectible figure?
Multicolor FDM can make attractive figures with distinct color regions, but color capability does not change the underlying nozzle-based detail limit. It’s a good choice for bold, larger designs. For tiny faces and small sculpted features, resin followed by painting will usually preserve more detail.