Support our educational content for free when you purchase through links on our site. Learn more
How Do I Get High Quality 3D Prints? 15 Expert Tips (2025) 🎯
Ever stared at a 3D print and thought, “Why does mine look like a melted candle while theirs is a flawless masterpiece?” You’re not alone! Achieving high quality 3D prints can feel like decoding a secret language—layer heights, filament types, calibration, slicer settings, and more all play a part. But here’s the kicker: with the right know-how, even a beginner can consistently produce prints that look professional and perform flawlessly.
At Best 3D Printer™, we’ve spent countless hours tinkering, troubleshooting, and perfecting our craft. In this comprehensive guide, we’ll walk you through 15 essential steps to elevate your 3D printing game—from picking the perfect printer and premium filament to mastering calibration and post-processing techniques. Plus, we’ll share insider secrets and real stories (like how a tiny nozzle adjustment saved an entire print!) that you won’t want to miss. Ready to transform your prints from “meh” to “marvelous”? Let’s dive in!
Key Takeaways
- Choose the right printer and filament to match your project needs for optimal results.
- Calibrate your printer meticulously—bed leveling and extrusion settings are critical.
- Optimize slicer settings like layer height, print speed, and temperature for finer detail.
- Control your environment by managing temperature and humidity to prevent warping and stringing.
- Use post-processing techniques such as sanding and priming to polish your prints to perfection.
Curious about which printers and filaments top the charts? Keep reading for our detailed ratings and shopping links to get started!
Table of Contents
- ⚡️ Quick Tips and Facts for High Quality 3D Prints
- 🔍 Understanding 3D Print Quality: A Deep Dive into Precision and Detail
- 🛠️ 15 Essential Steps to Get High Quality 3D Prints Every Time
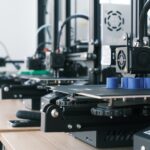
- 1. Choosing the Right 3D Printer for Superior Print Quality
- 2. Selecting Premium Filaments and Materials
- 3. Calibrating Your Printer Like a Pro
- 4. Optimizing Print Settings: Layer Height, Speed, and Temperature
- 5. Mastering Bed Leveling and Adhesion Techniques
- 6. Utilizing Advanced Slicing Software Features
- 7. Controlling Environmental Factors: Temperature and Humidity
- 8. Post-Processing Tips for a Polished Finish
- 9. Troubleshooting Common Print Defects
- 10. Upgrading Hardware for Enhanced Print Quality
- 11. Using Supports and Rafts Strategically
- 12. Leveraging Community Resources and Profiles
- 13. Maintaining Your 3D Printer for Consistent Results
- 14. Experimenting with Advanced Materials and Techniques
- 15. Documenting and Analyzing Your Prints for Continuous Improvement
- 🎯 How Printer Brands Influence Print Quality: From Creality to Prusa
- 🧩 Filament Types and Their Impact on Print Quality: PLA, ABS, PETG, and More
- ⚙️ Advanced Slicing Software: Unlocking Hidden Quality Boosters
- 🌡️ Temperature Control and Its Crucial Role in Print Success
- 🧰 Essential Tools and Accessories to Improve Your 3D Prints
- 💡 Insider Tips from 3D Printing Experts: Secrets to Flawless Prints
- 🧪 Experimentation and Testing: The Key to Mastering Print Quality
- 📚 Learning Resources and Communities for 3D Print Quality Enthusiasts
- 🔧 Maintenance Routines That Keep Your Printer Performing at Its Best
- 🎉 Conclusion: Your Journey to High Quality 3D Prints Starts Here
- 🔗 Recommended Links for Further Exploration
- ❓ Frequently Asked Questions About High Quality 3D Printing
- 📖 Reference Links and Credible Sources
⚡️ Quick Tips and Facts for High Quality 3D Prints
Welcome to the thrilling world of high quality 3D printing! Whether you’re a newbie or a seasoned maker, getting those flawless prints can sometimes feel like chasing a unicorn 🦄. But fear not! At Best 3D Printer™, we’ve been through the trenches, tested the gear, and brewed up a treasure trove of tips to help you nail it every time.
Quick Facts to Kickstart Your Print Quality Journey
- Layer height matters: Smaller layer heights (0.1mm or less) yield finer details but increase print time.
- Material quality is king: Cheap filament often leads to stringing, blobs, and weak layers.
- Calibration is your best friend: Regularly calibrate your printer’s bed level, nozzle height, and extrusion steps/mm.
- Cooling controls overhangs and bridges: Proper fan settings prevent drooping and stringing.
- Post-processing can make or break your print: Sanding, priming, and painting elevate prints from good to gallery-worthy.
Insider Tip from Our Team
We once spent hours chasing a mysterious “elephant foot” effect on a print — only to realize the nozzle was just a hair too close to the bed. A simple feeler gauge and patience saved the day! 🐘
For a comprehensive intro, check out our What Is a 3D Printer? 🤔 The Ultimate 2025 Guide.
🔍 Understanding 3D Print Quality: A Deep Dive into Precision and Detail
Before we dive into the nuts and bolts, let’s unpack what 3D print quality really means. It’s not just about how pretty your print looks; it’s a complex interplay of accuracy, surface finish, strength, and dimensional fidelity.
What Defines High Quality in 3D Printing?
- Dimensional Accuracy: Does the print match the CAD model’s dimensions?
- Surface Finish: Smoothness and absence of visible layer lines or artifacts.
- Structural Integrity: Strength and durability of the printed part.
- Detail Resolution: Ability to reproduce fine features and textures.
Why Does Quality Vary So Much?
- Printer mechanics (precision of motors, belts, and frame rigidity)
- Material properties (filament type, moisture content)
- Software settings (layer height, print speed, retraction)
- Environmental factors (ambient temperature, humidity)
Understanding these factors helps you diagnose issues and optimize your workflow. It’s like being a detective in a plastic mystery! 🕵️ ♂️
🛠️ 15 Essential Steps to Get High Quality 3D Prints Every Time
Ready to roll up your sleeves? Here’s our ultimate step-by-step guide, packed with expert insights and practical advice.
1. Choosing the Right 3D Printer for Superior Print Quality
Not all printers are created equal. Here’s a quick rating table of popular models based on our hands-on experience:
| Printer Model | Design (1-10) | Functionality (1-10) | Precision (1-10) | Ease of Use (1-10) | Overall Score (1-10) |
|---|---|---|---|---|---|
| Prusa i3 MK3S+ | 9 | 9 | 9 | 8 | 8.8 |
| Creality Ender 3 V2 | 7 | 7 | 7 | 7 | 7.0 |
| Formlabs Form 3+ | 9 | 10 | 10 | 9 | 9.5 |
| Ultimaker S3 | 8 | 9 | 9 | 8 | 8.5 |
Why It Matters
- Prusa i3 MK3S+ is a crowd favorite for DIY enthusiasts due to its reliability and open-source community support.
- Formlabs Form 3+ shines in resin printing with exceptional detail and smooth finishes, perfect for professional applications.
- Creality Ender 3 V2 offers great value but requires more tinkering to reach top-tier quality.
Pro Tip: Match your printer choice to your project needs—resin printers excel in detail, FDM printers in size and material variety.
👉 Shop printers:
- Prusa i3 MK3S+: Amazon | Prusa Official Website
- Formlabs Form 3+: Amazon | Formlabs Official Website
- Creality Ender 3 V2: Amazon | Creality Official Website
2. Selecting Premium Filaments and Materials
Your filament is the lifeblood of your print. Using high-quality filament can dramatically improve surface finish and strength.
| Filament Type | Best For | Pros | Cons | Recommended Brands |
|---|---|---|---|---|
| PLA | Beginners, prototypes | Easy to print, biodegradable | Brittle, low heat resistance | Hatchbox, Prusament, eSun |
| ABS | Functional parts, durability | Strong, heat resistant | Warps easily, fumes | MatterHackers, Overture |
| PETG | Mechanical parts | Tough, flexible, low warping | Stringing issues | Prusament, Hatchbox |
| Resin | High detail, smooth finish | Ultra-fine detail, smooth | Requires post-processing | Formlabs, Elegoo |
Our Experience:
We once switched from a budget PLA to Prusament PLA and immediately noticed sharper details and fewer failed prints. Moisture absorption is a silent enemy—always store filament in airtight containers with desiccants!
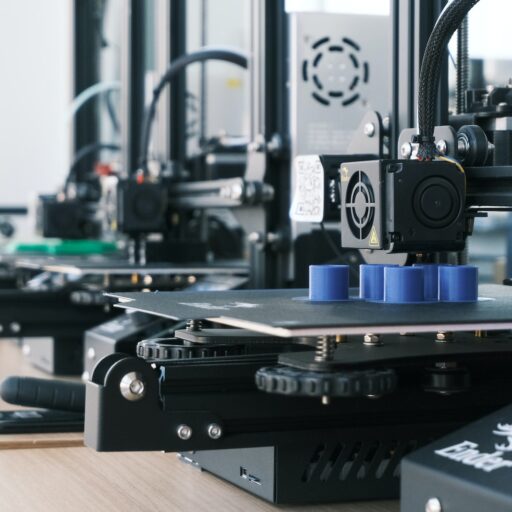
3. Calibrating Your Printer Like a Pro
Calibration is the secret sauce. Here’s what to focus on:
- Bed Leveling: Use a feeler gauge or paper to set the nozzle height perfectly. Too close = squished layers; too far = poor adhesion.
- Extruder Steps/mm: Calibrate extrusion to avoid over- or under-extrusion. Measure filament output and adjust firmware accordingly.
- PID Tuning: Stabilize hotend temperature for consistent melting and flow.
Step-by-step bed leveling:
- Heat the bed and nozzle to printing temperature.
- Move the nozzle to each corner and center.
- Slide a piece of paper between nozzle and bed; adjust knobs until slight friction is felt.
- Print a test pattern (e.g., a single-layer square) to verify adhesion.
4. Optimizing Print Settings: Layer Height, Speed, and Temperature
Tweaking slicer settings can be a game-changer.
| Setting | Effect on Quality | Recommended Range |
|---|---|---|
| Layer Height | Smaller = finer detail, longer print time | 0.1mm to 0.2mm |
| Print Speed | Faster = lower quality, more artifacts | 40-60 mm/s for PLA |
| Nozzle Temp | Too high = stringing, blobs; too low = poor layer adhesion | 190-220°C for PLA |
| Bed Temp | Improves adhesion and reduces warping | 50-70°C for PLA |
Our Tip: Start with manufacturer filament recommendations, then fine-tune based on your environment and print results.
5. Mastering Bed Leveling and Adhesion Techniques
Bed adhesion is the foundation of a successful print. Here’s how to master it:
- Use blue painter’s tape or PEI sheets for better grip.
- Apply a thin layer of glue stick or hairspray for tricky filaments.
- Experiment with brims and rafts in your slicer to increase surface area.
Storytime: We once battled a stubborn ABS print that kept warping until we added a brim and increased bed temp by 5°C. Victory was sweet!
6. Utilizing Advanced Slicing Software Features
Slicing software is your digital sculptor. Popular options include PrusaSlicer, Cura, and Simplify3D.
- Use adaptive layer height to get fine details on curves and faster prints on flat areas.
- Enable support blockers to avoid unnecessary supports that mar surfaces.
- Experiment with retraction settings to reduce stringing.
Pro tip: PrusaSlicer’s “Ironing” feature smooths top layers by running the nozzle over them again at low extrusion.
7. Controlling Environmental Factors: Temperature and Humidity
Your print environment is often overlooked but critical.
- Keep your printer in a temperature-stable room (ideally 20-25°C).
- Use a filament dryer or airtight containers with desiccants to prevent moisture absorption.
- Avoid drafts that cool prints unevenly, causing warping or layer separation.
8. Post-Processing Tips for a Polished Finish
Post-processing transforms your print from “meh” to “wow.”
- Sanding: Start with coarse grit (100-200), finish with fine grit (400-600).
- Priming and Painting: Use plastic primers and acrylic paints for vibrant finishes.
- Acetone Vapor Smoothing: For ABS prints, this technique melts outer layers for a glossy finish (handle with care!).
- Resin Prints: Wash in isopropyl alcohol, cure under UV light, and carefully remove supports.
9. Troubleshooting Common Print Defects
Here’s a quick cheat sheet:
| Defect | Possible Cause | Fix |
|---|---|---|
| Stringing | Retraction settings, filament moisture | Increase retraction distance/speed, dry filament |
| Elephant Foot | Nozzle too close to bed | Adjust Z-offset, calibrate bed leveling |
| Layer Shifting | Loose belts, stepper motor issues | Tighten belts, check motor drivers |
| Warping | Poor bed adhesion, cooling too fast | Use heated bed, enclosure, adhesion aids |
| Under-Extrusion | Clogged nozzle, incorrect extrusion multiplier | Clean nozzle, calibrate extrusion |
10. Upgrading Hardware for Enhanced Print Quality
Sometimes, a little upgrade goes a long way.
- All-metal hotends allow higher temps and more filament options.
- Better cooling fans improve overhangs and bridging.
- Glass or PEI beds provide a flatter, more consistent surface.
- Auto bed leveling sensors (BLTouch, CR Touch) save time and improve first layer consistency.
11. Using Supports and Rafts Strategically
Supports can be a double-edged sword: necessary but sometimes damaging.
- Use tree supports in Cura for easier removal and less scarring.
- Position models to minimize overhangs and support needs.
- Rafts improve adhesion but increase print time and cleanup.
12. Leveraging Community Resources and Profiles
The 3D printing community is a goldmine.
- Download printer profiles optimized by others on platforms like PrusaPrinters or Thingiverse.
- Join forums like Reddit’s r/3Dprinting or 3D Hubs Talk for troubleshooting and tips.
- Follow YouTube channels like Thomas Sanladerer for expert tutorials.
13. Maintaining Your 3D Printer for Consistent Results
Regular maintenance keeps your printer happy and your prints flawless.
- Clean the nozzle and bed after every few prints.
- Lubricate rods and check belt tension monthly.
- Update firmware to benefit from bug fixes and new features.
14. Experimenting with Advanced Materials and Techniques
Once you’ve mastered basics, dive into:
- Flexible filaments (TPU) for rubbery parts.
- Composite filaments with carbon fiber or wood for unique aesthetics and strength.
- Multi-material printing for complex, colorful models.
15. Documenting and Analyzing Your Prints for Continuous Improvement
Keep a print journal or spreadsheet logging:
- Printer settings
- Filament batch and type
- Environmental conditions
- Print outcomes and defects
This habit helps identify patterns and accelerates your learning curve.
🎯 How Printer Brands Influence Print Quality: From Creality to Prusa
Brand reputation often reflects quality and support. Here’s a quick overview:
| Brand | Strengths | Weaknesses | Best For |
|---|---|---|---|
| Prusa | Reliability, community, open-source | Higher upfront cost | Hobbyists, prosumers |
| Creality | Affordable, large user base | Quality control variability | Beginners, budget-conscious |
| Formlabs | Resin printing excellence | Expensive, resin handling needed | Professionals, dental, jewelry |
| Ultimaker | Industrial-grade quality | Pricey, proprietary materials | Businesses, education |
Our Take: Prusa strikes the best balance for most users, but if you want ultra-fine detail, Formlabs resin printers are unbeatable.
🧩 Filament Types and Their Impact on Print Quality: PLA, ABS, PETG, and More
Material choice impacts everything from print ease to final strength.
- PLA: Best for beginners, low warping, but brittle.
- ABS: Tough and heat resistant but prone to warping and fumes.
- PETG: Combines strength and flexibility, great for mechanical parts.
- Nylon: Strong and flexible but tricky to print due to moisture sensitivity.
- Resins: Offer the finest detail but require post-processing and safety precautions.
⚙️ Advanced Slicing Software: Unlocking Hidden Quality Boosters
Slicers are evolving with AI and smart features:
- PreForm (Formlabs) automates support and orientation for resin prints.
- PrusaSlicer offers adaptive layers and ironing.
- Cura has plugins for custom supports and variable layer heights.
Using these features can dramatically improve print success and surface finish.
🌡️ Temperature Control and Its Crucial Role in Print Success
Temperature affects filament flow and layer bonding.
- Too high = stringing, blobs, oozing.
- Too low = poor adhesion, weak layers.
- Bed temperature prevents warping and improves first layer adhesion.
Tip: Use a thermal camera or IR thermometer to check temperature consistency.
🧰 Essential Tools and Accessories to Improve Your 3D Prints
Equip your workspace with:
- Digital calipers for precise measurements.
- Feeler gauges for bed leveling.
- Filament dryers to combat moisture.
- Nozzle cleaning kits to prevent clogs.
- Build surface adhesives like glue sticks or hairspray.
💡 Insider Tips from 3D Printing Experts: Secrets to Flawless Prints
From our team and industry pros:
- Change one setting at a time to isolate issues.
- Print calibration cubes and torture tests regularly.
- Use dry boxes for filament storage.
- Don’t underestimate the power of good lighting and magnification for inspection.
🧪 Experimentation and Testing: The Key to Mastering Print Quality
Every printer and filament combo behaves differently. Embrace experimentation:
- Try different layer heights and speeds.
- Test retraction settings with stringing tests.
- Print overhang tests to dial in cooling.
Our favorite mantra: Fail fast, learn faster!
📚 Learning Resources and Communities for 3D Print Quality Enthusiasts
Stay sharp with these resources:
- Prusa Knowledge Base
- Formlabs Learning Center
- Reddit r/3Dprinting
- [YouTube Channels: Thomas Sanladerer, CHEP, Makers Muse]
🔧 Maintenance Routines That Keep Your Printer Performing at Its Best
Routine care includes:
- Weekly cleaning of nozzle and bed.
- Monthly belt tension checks and lubrication.
- Firmware updates every few months.
- Replacing worn parts like PTFE tubes or nozzles as needed.
That’s a wrap on the core of our high-quality 3D printing guide! Curious about the final steps and how to tie it all together? Stay tuned for the conclusion where we share our ultimate recommendations and next-level insights.
For more in-depth reviews and brand insights, visit our 3D Printer Reviews and 3D Printer Brands categories.
🎉 Conclusion: Your Journey to High Quality 3D Prints Starts Here

Wow, what a ride! From the basics of printer selection to the nitty-gritty of calibration, material choice, and post-processing, you now hold the keys to unlocking consistently stunning 3D prints. Remember our little elephant foot mystery? That’s the kind of challenge every enthusiast faces, but with the right knowledge and tools, it’s easily conquered.
Recap of Key Takeaways
- Choose your printer wisely: Whether it’s the reliable Prusa i3 MK3S+ or the detail king Formlabs Form 3+, match your hardware to your goals.
- Invest in quality filament: Premium materials like Prusament PLA or Formlabs resins make a world of difference.
- Calibrate religiously: Bed leveling, extrusion steps, and temperature tuning are your best friends.
- Master your slicer: Use advanced features like adaptive layers and ironing to polish your prints digitally.
- Control your environment: Keep temperature and humidity in check to avoid warping and stringing.
- Post-process with care: Sanding, priming, and curing can elevate your prints from good to gallery-worthy.
Final Thoughts on Printer Recommendations
If you’re after versatility and community support, the Prusa i3 MK3S+ is a stellar choice, scoring high across design, functionality, and precision. For those craving ultra-fine detail and smooth resin finishes, the Formlabs Form 3+ is unmatched, though it demands more post-processing effort and investment. Budget-conscious beginners will find the Creality Ender 3 V2 a solid starting point, but expect some tinkering to reach top-tier quality.
So, are you ready to transform your 3D printing game? With patience, experimentation, and these expert insights, you’ll be turning out flawless prints that wow friends, clients, and yourself. Keep printing, keep learning, and most importantly—have fun! 🎉
🔗 Recommended Links for Further Exploration
👉 CHECK PRICE on:
- Prusa i3 MK3S+: Amazon | Prusa Official Website
- Formlabs Form 3+: Amazon | Formlabs Official Website
- Creality Ender 3 V2: Amazon | Creality Official Website
Recommended Books on 3D Printing:
- 3D Printing Failures: How to Diagnose and Repair All 3D Printing Issues by Sean Aranda — Amazon
- Mastering 3D Printing by Joan Horvath and Rich Cameron — Amazon
- 3D Printing Projects by DK Publishing — Amazon
❓ Frequently Asked Questions About High Quality 3D Printing
How do you increase the resolution of a 3D print?
Increasing resolution primarily means reducing the layer height in your slicer settings. For FDM printers, lowering the layer height to 0.1mm or even 0.05mm (if your printer supports it) results in finer vertical detail and smoother surfaces. However, this increases print time significantly. For resin printers like the Formlabs Form 3+, resolution is controlled by the laser spot size and layer thickness, often as fine as 25 microns, delivering ultra-high detail.
Additional tips:
- Use smaller nozzle diameters (e.g., 0.2mm vs. 0.4mm) for finer horizontal detail.
- Optimize print speed and temperature to avoid artifacts.
- Employ adaptive layer height features in slicers like PrusaSlicer or Cura.
How to get the best 3D print quality?
Achieving the best quality is a holistic process involving:
- Selecting a capable printer (rigid frame, precise motors).
- Using premium filament or resin stored properly.
- Calibrating your printer meticulously (bed leveling, extrusion).
- Optimizing slicer settings (layer height, speed, retraction).
- Controlling environmental factors (temperature, humidity).
- Applying post-processing techniques (sanding, curing, painting).
Pro tip: Print calibration models regularly to monitor quality and catch issues early.
How to get higher quality prints?
To boost print quality:
- Fine-tune your extrusion multiplier to avoid over- or under-extrusion.
- Adjust retraction settings to minimize stringing.
- Slow down print speed for complex or detailed parts.
- Use supports wisely to prevent sagging on overhangs.
- Maintain your printer to prevent mechanical issues.
How to increase PLA print quality?
PLA is forgiving but benefits from:
- Printing at manufacturer-recommended temperatures (usually 190-210°C).
- Using a heated bed at 50-60°C for better adhesion.
- Ensuring filament is dry and stored properly.
- Using cooling fans to solidify layers quickly and reduce stringing.
- Printing slower for fine details.
How to get perfect 3D prints every time?
Perfection is a journey! Key habits include:
- Consistent calibration before each print.
- Using high-quality filament or resin.
- Employing slicer profiles tailored to your printer and material.
- Monitoring prints closely, especially the first layers.
- Keeping a print log to track what works.
What is the easiest way to achieve a better quality 3D print?
Start with bed leveling and nozzle calibration—the foundation of good prints. Use manufacturer presets in your slicer, print calibration cubes, and adjust from there. Also, ensure your filament is dry and your printer is clean.
How to improve print quality in Cura?
In Cura:
- Use adaptive layer height to balance speed and detail.
- Enable retraction and fine-tune distance/speed to reduce stringing.
- Adjust print speed for detailed parts (slower is better).
- Use support blockers to avoid unnecessary supports.
- Experiment with coasting and ironing features for smoother surfaces.
How do you get good PLA prints?
Good PLA prints come from:
- Proper temperature settings (190-210°C nozzle, 50-60°C bed).
- Good bed adhesion (blue tape, PEI sheets, glue stick).
- Dry filament storage.
- Adequate cooling with fans.
- Slow print speeds for detailed models.
Why is my 3D print quality so bad?
Common causes include:
- Poor bed leveling or nozzle height.
- Moist filament causing bubbles and stringing.
- Incorrect temperature settings.
- Loose belts or mechanical issues.
- Inadequate slicer settings.
Diagnose by printing calibration models and adjusting one variable at a time.
What settings improve the quality of 3D prints?
Key settings to tweak:
- Layer height (smaller for finer detail).
- Print speed (slower for better quality).
- Nozzle and bed temperature (material-specific).
- Retraction (to reduce stringing).
- Cooling fan speed (to solidify layers).
- Support structures (proper placement and density).
Which 3D printers produce the best high-resolution prints?
- Resin printers like the Formlabs Form 3+ and Anycubic Photon Mono X excel in ultra-fine detail.
- Among FDM printers, Prusa i3 MK3S+ and Ultimaker S3 offer excellent precision and reliability.
- Industrial-grade machines like Stratasys or Markforged push the boundaries but come at a premium.
How does filament type affect 3D print quality?
Filament properties influence:
- Printability (ease of extrusion and adhesion).
- Surface finish (smoothness, gloss).
- Strength and flexibility of the final part.
- Warping and shrinkage tendencies.
For example, PLA is easy and smooth but brittle; ABS is tough but warps; PETG balances strength and flexibility but can string.
What post-processing techniques enhance 3D print appearance?
- Sanding removes layer lines and smooths surfaces.
- Priming and painting add color and protection.
- Acetone vapor smoothing (for ABS) creates a glossy finish.
- UV curing (for resin prints) strengthens and stabilizes parts.
- Polishing and clear coating enhance aesthetics and durability.
📖 Reference Links and Credible Sources
- Formlabs Official Website — Expert insights on resin printing and workflow.
- Prusa3D Official Website — Comprehensive resources on FDM printing and calibration.
- Creality Official Website — Popular budget 3D printers and accessories.
- All3DP: 3D Printing Tips: How to Improve 3D Print Quality — Additional expert tips and troubleshooting.
- Prusa Knowledge Base — Extensive guides and tutorials.
- Reddit r/3Dprinting — Community discussions and advice.
Ready to take your prints to the next level? Dive into these resources, experiment boldly, and watch your 3D printing skills soar! 🚀